Taking cuttings can be done when roses are dormant or in July when the stems have flowered. In fact it can be done all year round as long as you don't take new, soft wood. It has to be ad least medium hard if you do it in summer.
Take your sécateurs or clippers and rub the blades with some desinfectant and go to your rose. Always take wood at least as thick as a pencil. Prune right underneath an eye. You can take several cuttings from a long stem. They have to be approx 20 cm or 8 inches long. If done in summer you remove all leaves except the two at the top. Now take scissors ✂ and remove a part of each of those two leaves.
Dip the bottom of your cuttings in root powder and give it a little slap to remove all excess.
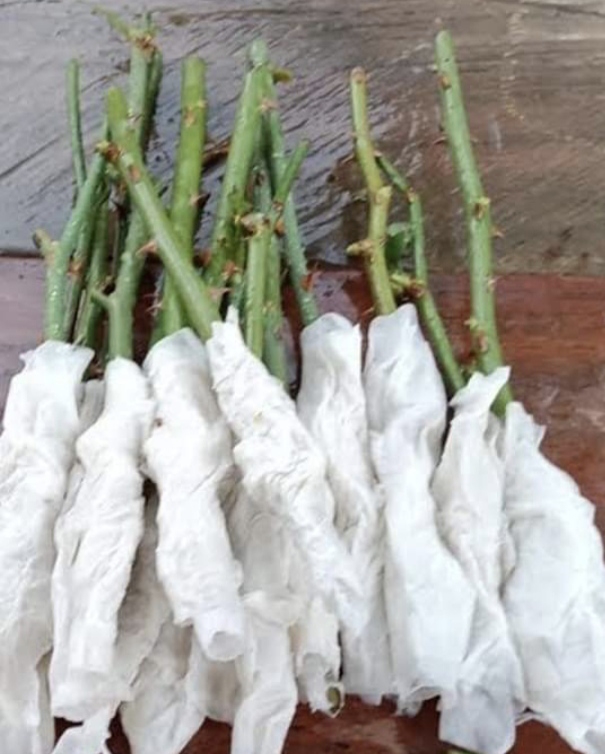
Now you take kitchen paper and you wrap it around the lower part of the cutting. When they are all wrapped in paper you spray them with a spray bottle filled with just water. They have to be really wet. Now you take a plastic zipper bag, the ones you can re-use for your sandwiches, those with a zipper. Put the cuttings in the bag and zip it up so no moisture can escape. Put the bag in a light spot but no direct sunlight. Room temperature or just a bit higher is perfect.
After three to four weeks you should see roots growing out of the kitchen paper. Maybe not all cuttings will succeed but that's okay, it doesn't cost you anything.
When you see the roots clearly you open up the bag and you remove the paper gently. Put the cuttings in a glass of water immediately so don't let them dry out.
Take plastic pots (higher is better than wide) and fill them for 1/3 with potting compost. Take your cuttings and put them in the pots. Hold them with one hand and fill up with your other hand. Gently press the soil around the cuttings and give plenty of water, it has to come out at the bottom. Make sure that at least 1/3 of the length of the cuttings is covered with soil.
Now you can keep them inside for a few weeks in a bright spot and after that they can go outside in a sheltered spot. No direct sun and no frost. If frost is predicted you bring them to a bright 🔆 frost free place. Don't let the pots dry out so make sure to check every few days.
In spring they can go outside. Once you see that they start to grow you can bring them to partial shade first and after one week they can stay in full sun. Always check if they have enough moister but don't drown them.
When you see that they are really taking off and roots are starting to come out at the bottom you can plant them directly in their final spot or you plant them in a bigger pot.
Good luck!